If you have a newer computer but an older version of our “Neuropatholator” program,
you may need a new Dongle Driver Installer. CLICK HERE to download it
Downloading software
If you received a link to our Neuropatholator software, you’ll need to download a ZIP (aka compressed) file, uncompress it, and place the contents on the desktop.
The file you are downloading can be quite large, over 2 gigabytes. How you download it varies from web browser to web browser. Most of the time, your browser will download it to the computer’s “Download” folder. Some will simply open it automatically. Either way, make sure you open the downloaded ZIP file.
Most of the time, your operating system will show you the contents of the ZIP folder like it was a new window. Sometimes it might ask you if you want to extract it first. Once you see a “VOFolder”, do either of the following:
Right click the “VOFolder” and select copy, then goto the Desktop and right click and select paste
or
Click and drag the “VOFolder” to the Desktop.
or
Right Click on the ZIP icon and select: “Extract All…”

If you are unable to copy or drag the file from the compressed file, you may have to extract it first.
Please check below on how to install the dongle drivers.
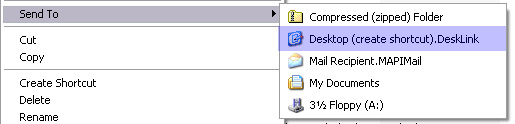
For convenience you’ll want to create a shortcut for the program. Right click the Neuropatholator.exe file and select “Send to” and then “Desktop (create shortcut)”
Chances are we also emailed you 2 files: “prefs.dat” and “security.vo.” These 2 files are needed to run the program. Please download them and place them in the “VOFolder”
Installing from DVD
If you received a DVD with the program on it, you’ll need to copy the contents to a folder on the desktop. Form “My Computer” open up the DVD drive (often D:/ Drive) and open it up,. Then either:
Right click the “VOFolder” and select copy, then goto the Desktop and right click and select paste
or
Click and drag the “VOFolder” to the Desktop.
Please check below on how to install the dongle drivers.
For connivance you’ll want to create a shortcut for the program. Right click the Neuropatholator.exe file and select “Send to” and then “Desktop (create shortcut)”
Chances are we also emailed you 2 files: “prefs.dat” and “security.vo.” These 2 files are needed ot run the program. Please download them and place them in the “VOFolder”
First off, Make sure the dongle is Unpluged!
Run the “1_Install_Dongle.exe.” Select “KEYLOCK 2 (USB w/ Driver)” under Dongle Type, and “Standalone” under Installation Type.
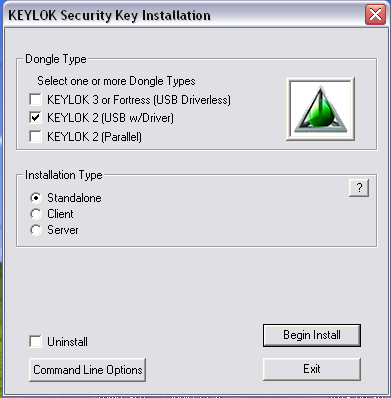
Click “Begin Install” and follow the prompts. After installation is complete, close the installer and plug in the dongle.
To test if the installation was successful, run the program “VerifyLocalKey.exe”
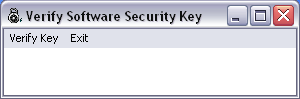
Click “Verify Key.” If successful, you’ll see the serial number of the dongle appear.
If it fails, repeat the installation process.
If you have a newer computer (Windows 10) but an older version of our “Neuropatholator” program, you may need a new Dongle Driver Installer. CLICK HERE to download it
When first running the Neuropatholator or PopUp software, you’ll see this log in screen. It’s on this screen where you enter the information we provided for you:
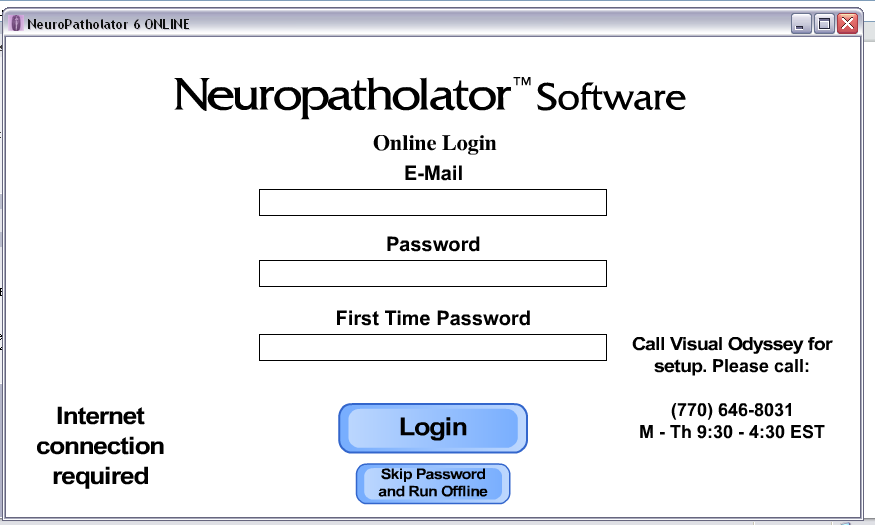
The First Time Password only has to be entered once, and you won’t need to enter it again the next time you launch the software.
This login process uses “cookies” (tiny bits of data that are used to save variables) on your computer to save the information. It is possible that a virus protector or even a Windows Update can delete the “cookies.” If this happens, you may need to contact us to get a new First Time Password.
If you don’t have access to the internet, you may press the”Skip Password and Run Offline” button to run the software without logging in for up to 3 DAYS. After those 3 days, you’ll need to login the normal way. This also resets the 3 day timer if needed.
If you still don’t have access to the internet, many smart phones can be used as a wifi hotspot. You can use this to login and then run offline for 3 days. Remember to turn off your hotspot afterwards!
The status bar looping when the Neuropatholator is opening often means that something is incorrect or missing. Please make sure:
You are not running from a “ZIPed” (aka Compressed) folder.
Look at the folder and make sure there isn’t a zipper on it. If there is, you’ll need to extract the contents and place it on the desktop.
The “Neuropatholator” program is not being run within the “VOFolder”
The program must be located within the “VOFolder.” Make sure if you’re creating a shortcut, you don’t accidently move the program to the desktop.
You’re missing a prefs.dat file, or it is incomplete.
The file named “prefs.dat” contains many saved preferences, and also includes your “Practice Name” that appears in the program. If the practice name within this file, and the one stored in the data for the Dongle, don’t match… the program will not run.
Open the program named “2_Enter_Practice_Name.exe” and make sure there is data there. If it is blank (or incorrect), try entering the name of your practice. Since capitalization and spacing matter, you may have to get the exact name directly from us. Please contact us if that is the case.
The dongle incorrectly programed
It’s possible the dongle has the incorrect data (or none at all) stored on it, so it’s not finding any licensing to run. It is hard to tell if this is the case because it’s all behind the scenes stuff. If your practice name seems correct (from the previous bullet point), it may be a dongle issue. Please give us a call and we’ll send you a new “Security.vo” file that will reprogram the dongle when the NP program is run.
If you can’t locate the “Neuropatholator” software, or the shortcut is invalid… it’s possible the program was removed by Windows Defender or a 3rd party Virus Protector.
If you are using a Virus scanner, then that is the most probable suspect. Some virus scanners will give no warning when they believe a program is dangerous. They will simply get rid of it with no way to recover it. Some programs will give a warning, or place the program in a “quarantine” folder.
You’ll need to find another copy of your Neuropatholaror program. If we mailed you a DVD, please try and locate it and copy the program.
If you downloaded it via a link, then more than likely you still have our email in your inbox. Search for visualodsy@aol.com in your email to search for the link.
It’s also possible the compressed (ZIP) file is still on your computer. Check your Downloads folder.
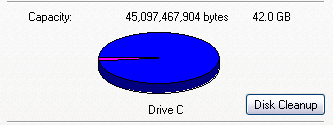
This might not be a problem on most modern computers, but if you’re using a self contained Intel Compute Stick, this might become an issue. (The Neuropatholator will sometimes create temporary windows files that might not be erased automatically.)
This can be easily be fixed by running “disk clean up” under your C Drive’s Properties.
For older software, your operating system might be too new.
While this isn’t usually an issue, we’ve found that Version 4 and below (and version 5.67) sometimes won’t run on newer computers .
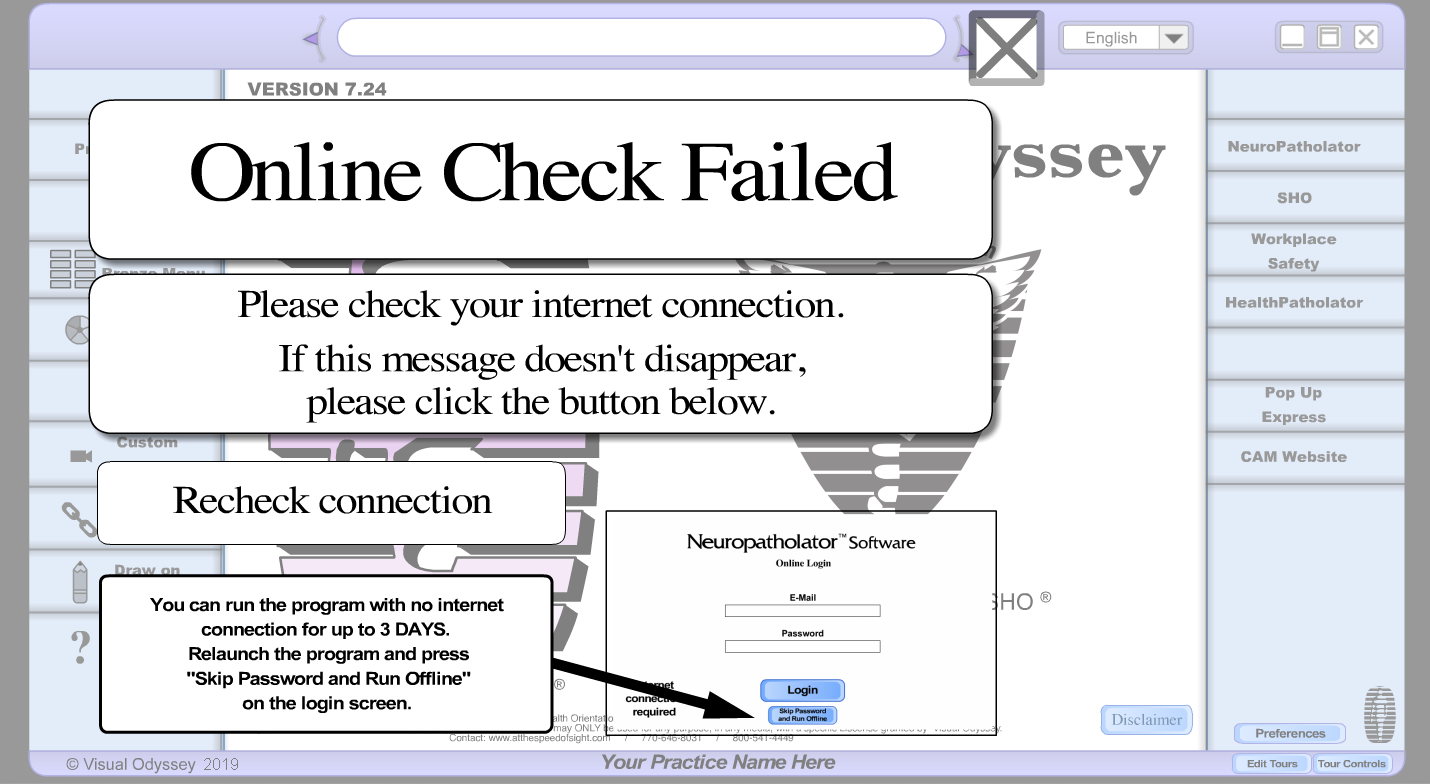
If you are running the Neuropatholator and a message pops up saying “Online Check Failed”, then one of two things happened:
- Your computer lost it’s internet connection or
-
The Neuropatholator could not connect to our server to verify your login details.
More than likely, your internet was down (or very slow) during one of the programs online checks. Click the “Recheck Connection” to reconnect, and the program should be useable again.
If you lost your internet connection, and you’re not sure when it’ll be back… close the program (via the X button in the upper right hand corner) and relaunch the Neuropatholator. Instead of pressing “Log in“, press “Skip Password and Run Offline.” This will allow the run the program for 3 days without the need to log in. After 3 days, you must log in again. See Online Login Instructions above for more information.
Replacing MS300 Switch – Read Everything First
Tools Needed:
5/16” Nutdriver
Phillips Head Screwdriver
Soldering Iron*
Solder*
De-solder tool*
solder braid* or solder sucker*
*(Available at Radio Shack)
NOTE: UNIT MUST BE UNPLUGGED FOR THIS REPAIR
**Whenever the unit is face down, it should be on a soft padded surface with a hole or cavity for the power switch, so there is no pressure on the switches or the chart front.
1) With the unit face up, pull blue & white caps off of switches.
2) Put unit on it’s front, protected by as indicated above.
- VERY IMPORTANT – Do Not allow ANY pressure against Power switch or others or you might crack the chart front and it is NOT replaceable.
3) Turn the unit over and take back off Neuropatholator but keep wires connected.
Remove the screws around the perimeter of the hard-board back.
DO NOT REMOVE screws holding the transformer grill to hard-board back and screws holding transformer to grill.
- Separate back and transformer from main chart cabinet by pulling the plug in the transformer bundle.
4) Pull off all blue and white buttons
- Unscrew all switch nuts, but leave the top and bottom ones on temporarily.
- Locate the 6 soldered terminals that correspond to the one(s) you are replacing.
- Using a de-soldering tool, soldering braid, or solder sucker, AND soldering iron, heat switch prongs on circuit board to pull solder out of switch holes. There are 6 prongs per switch. I recommend desoldering all 6 terminals of each switch before removing the switch/PCB assembly from the front of the chart. The desoldering operation is best if the board is not loose.
- If you have a solder sucker I highly recommend that as your first step or you could use solder braid. I usually recommend solder braid as a final step in both circumstances.
5) Remove nuts off of switches, using a 5/16” nut driver.
*Note: Pliers may scratch the front of unit.
6) GENTLY push on switches until circuit board is out of holes.
- Now unscrew the last two switch nuts and pull the printed circuit board away from the chart.
- BE VERY CAREFUL to not wiggle vigorously, as pulling the switches out or pushing back in could cause a crack in the front. Again, NOT replaceable.
7) Heat the tiny bit of solder remaining around each terminal as you slowly wiggle the switch backand forth to work it out of the board.
- DANGER – IMPORTANT the inside of each hole is lined with a VERY thin copper lining that often transfers the circuit from one side of the board to the other. If you pull the switch while the terminal is still attached and cold, it will tear the lining out of the hole and may start to pull the circuit away from the board. This greatly complicates the repair.
8) Replace broken switch with new switch. Make sure that new switch is facing the correct way. (Words on the switch should face the bottom of the circuit board toward the electronic components. See other switches for orientation. It is best not to assume that the metal wasn’t put on backwards. We’ve seen about one instance in every 5000 switches. I recommend using a continuity meter to confirm that the center pole of each row is normally on at rest or when activated as printed on the metal.)
9) Using soldering iron and solder, melt a very small amount of solder into ONLY ONE switch hole, For now a light ‘tack’ of solder is all that’s necessary.We want the switch to wiggle. By soldering only one terminal the switch can be repositioned slightly to be coming out of the front straight.
10) After solder is cooled, place circuit board back into Neuropatholator front, by lining up the switch ends to the holes in the front. Press GENTLY, but firmly on circuit board until the switches are in place. (PUSHING TOO HARD ON THE SWITCH AND PRINTED CIRCUIT BOARD FROM BEHIND CAN CRACK THE FRONT!)
11) Make sure that no wires or light sockets are wedged or in the way of the circuit board.
12) Once circuit board is seated completely, solder the other 5 switch holes and reheat and fill the one you originally soldered.
- A good solder joint is made when both the terminal and the ring of the hole are brought to the same temperature and the electronic solder is melted by touching the other side of the terminal and fed into the switch and terminal and PCB hole.
13) Carefully flip the unit face up.
14) Put nuts back on switches using a nut driver. Tighten until just “snug”.
Note: TOO MUCH TIGHTENING COULD CRACK THE FRONT OF THE UNIT.
15) Replace switch caps on switches.
16) Plug in ANS unit and test.
- REMEMBER – once power cord is plugged in – the power switch and some terminals of the transformer have 110 volts. CAREFUL.
17) Make sure that no wires or light sockets are wedged or in the way of the circuit board.
18) Carefully put Neuropatholator face down.
19) Attach the back securely.
Visual Odyssey, Inc is not responsible for any damage incurred to the Neuropatholator Wall Chart while being repaired by a non-approved Visual Odyssey technician.
You may contact us at:
770-646-8031 – 800-541-4449
visualodsy@aol.com